Table of content
 What is a test overview and plan?
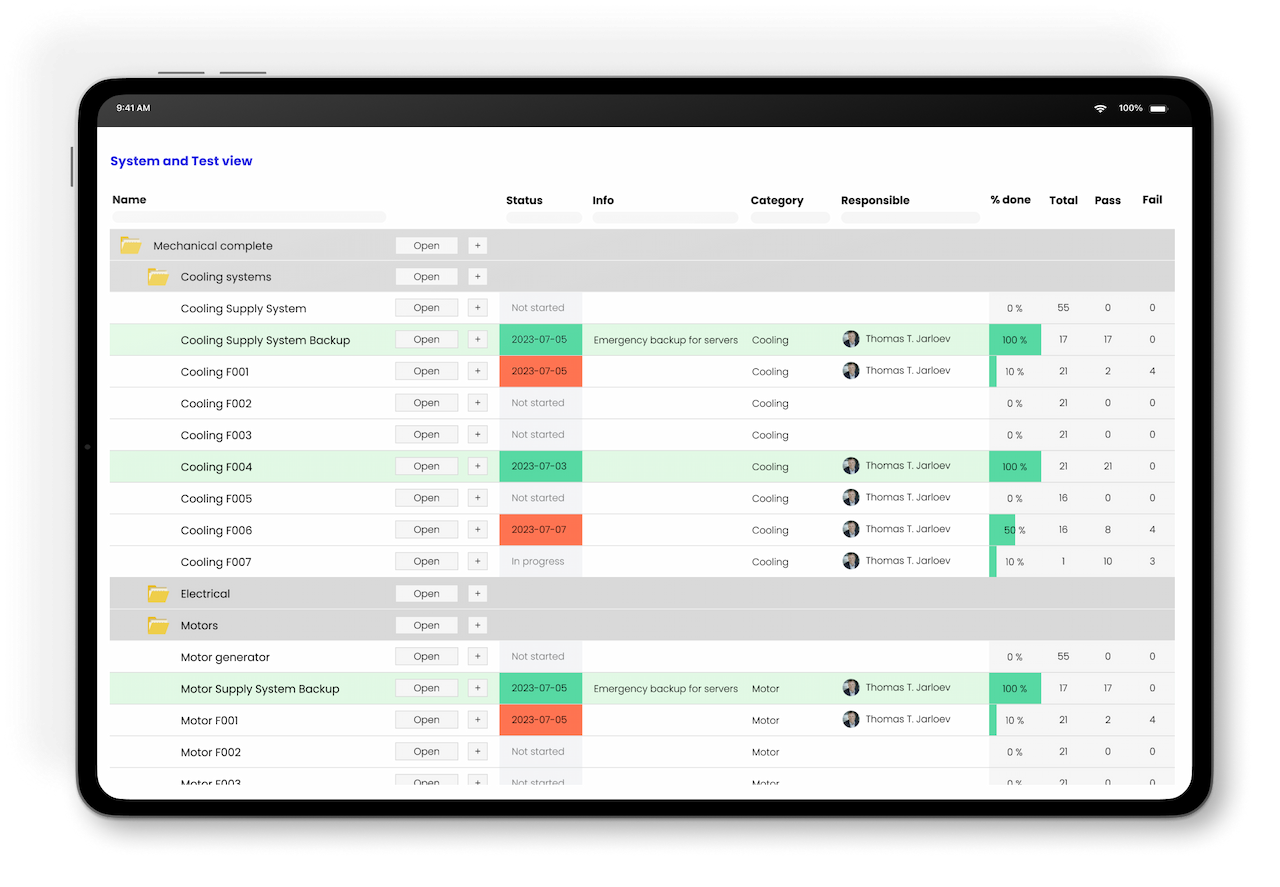
The test overview is a comprehensive view of all testing, assets, and equipment involved in a commissioning project. It provides direct insights into what needs to be tested and who is responsible for each task.
A well-structured test overview acts as a superpower, offering real-time insights, supporting collaboration, ensuring responsibility, and facilitating customizable reporting.
The test overview is a tool to manage all the tests in one place on the project.
How do you create the test view and plan?
Creating an effective test overview requires a systematic approach to ensure that all aspects of the commissioning project are adequately covered. You need to be aware of the different systems and equipment before you can create the overview. Therefore, it is often first possible to finalize the document during the design phases.
The following steps can help you create a robust test overview:
a. Define Project Scope and Client Requirements:
- Clearly understand the scope of the commissioning project and any specific requirements outlined by the client.
- Identify the systems, assets, and equipment that need testing.
b. Choose the Structure Type:
- Consider the nature of the project and the factors mentioned earlier (verification type, area/room, or system/asset) to determine the most suitable structure for the test overview.
c. Utilize Project Management Tools:
- Leverage project management tools like CxPlanner for seamless organization and collaboration.
- Input relevant project details, including assets, systems, and testing requirements into the chosen tool.
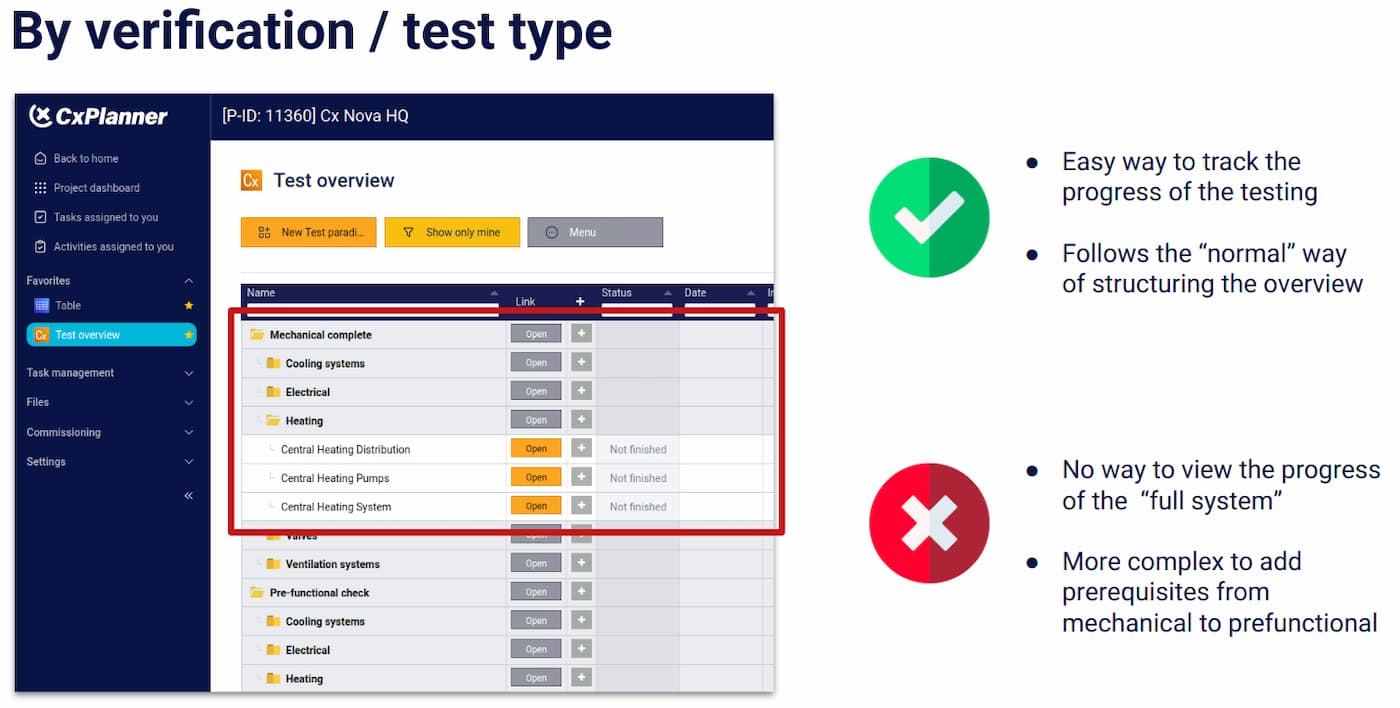
d. Breakdown by Verification Type:
- If opting for verification type, categorize assets into main verification areas (e.g., mechanical checks, pre-functional checks).
- Within each verification area, outline individual systems or equipment and their associated checks.
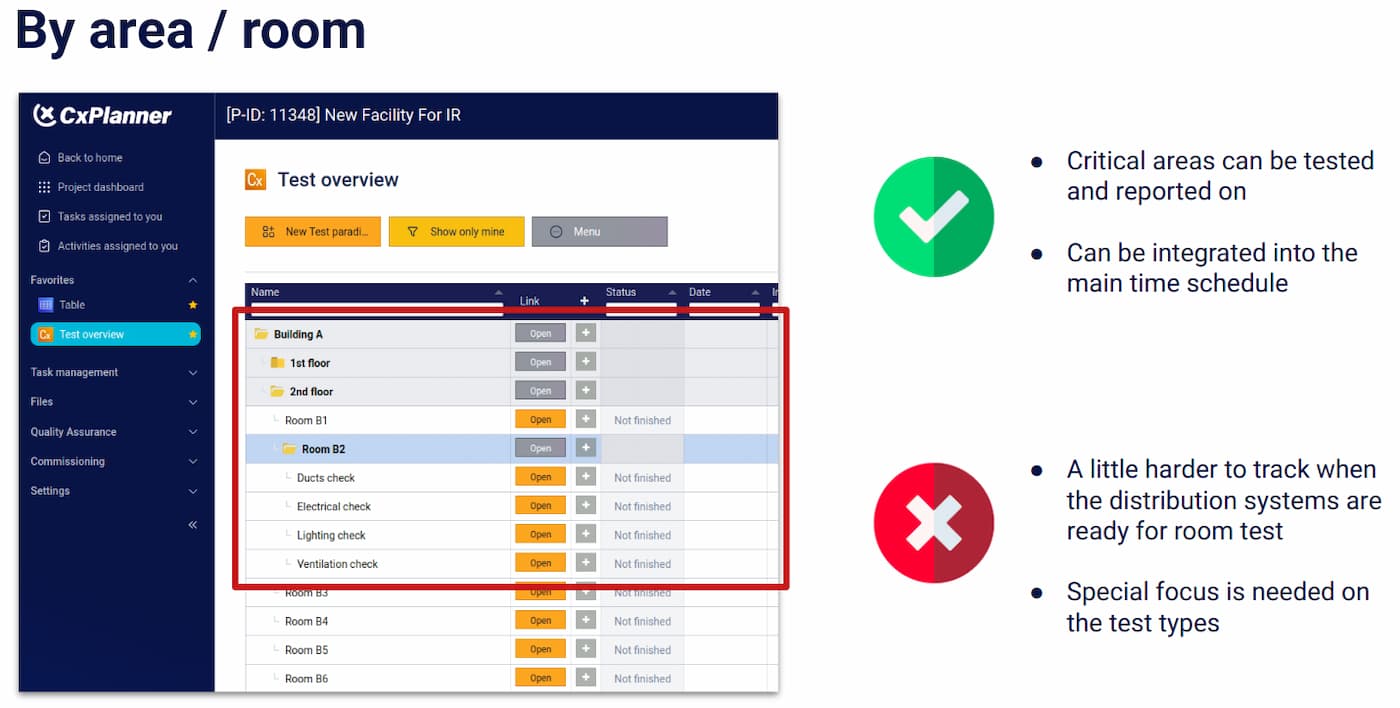
e. Divide by Area or Room:
- For area/room-based structuring, categorize assets by building areas and specific rooms.
- Specify the tests or checks required for each room, considering critical areas that may need special attention.
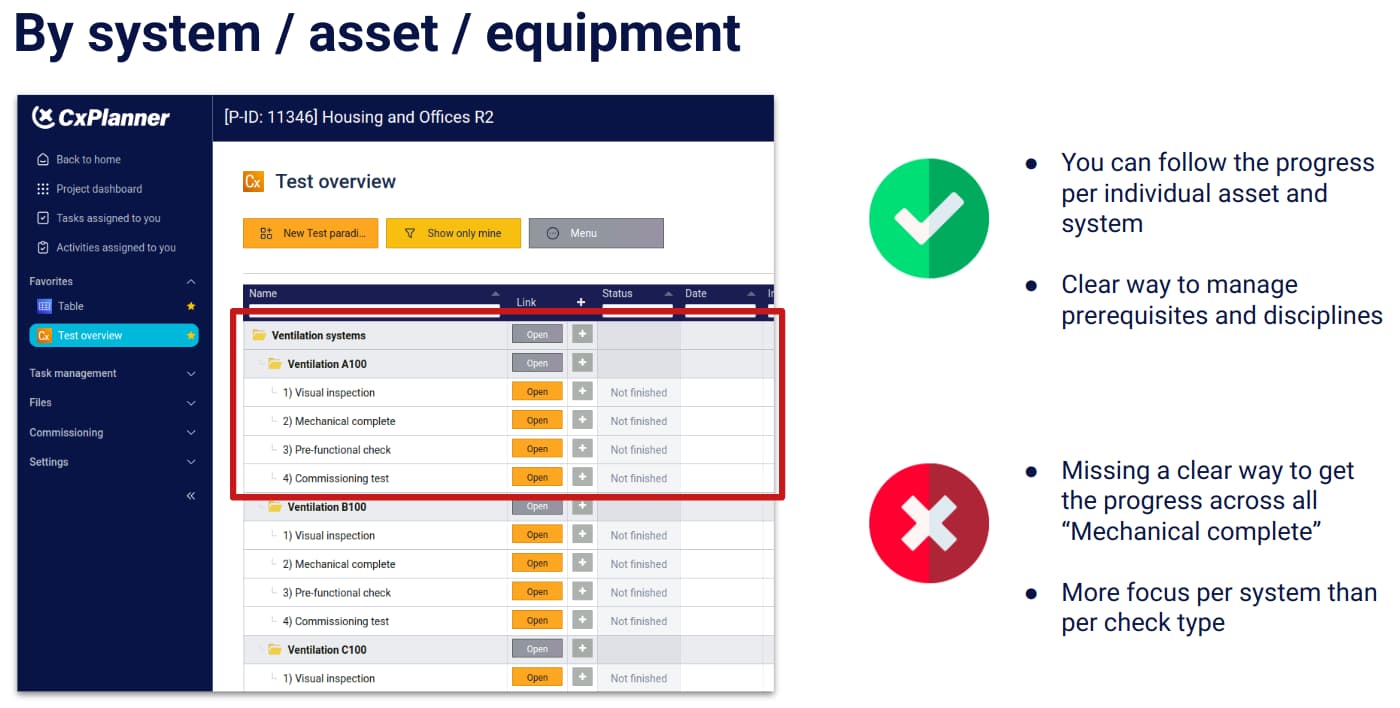
f. Organize by System, Asset, or Equipment:
- If organizing by system/asset, divide assets into specific systems (e.g., ventilation, cooling).
- Detail the checks or tests associated with each individual asset within the system.
g. Establish Dependencies and Prerequisites:
- Clearly define dependencies and prerequisites for each test or check.
- Ensure that the sequence of testing aligns with the project's workflow and requirements.
h. Integrate with Project Timeline:
- Align the test overview with the overall project timeline, ensuring that commissioning activities fit seamlessly into the construction schedule.
- Use visual aids to represent progress and milestones.
i. Collaborate and Assign Responsibilities:
- Facilitate collaboration among team members by assigning responsibilities for each test or check.
- Clearly communicate roles and expectations to ensure accountability.
j. Regularly Update and Monitor:
- Continuously update the test overview as the project progresses.
- Monitor completion rates, identify bottlenecks, and make adjustments as needed.
k. Generate Reports and Dashboards:
- Utilize reporting features to generate customized reports on the progress of testing.
- Create dashboards that offer a visual representation of overall project status.
l. Review and Adapt:
- Periodically review the effectiveness of the chosen test overview structure.
- Adapt the structure based on lessons learned and evolving project requirements.
How to structure systems and equipment in the overview
When structuring the test overview, there are three primary ways to consider:
- Verification of Test Type
- By Area or Room
- By System, Asset, or Equipment
Verification of Test Type
- Divides assets into main verification areas (e.g., mechanical checks, pre-functional checks).
- Provides a detailed breakdown of individual systems or equipment within each verification area.
- Pros: Easy progress tracking within specific verification areas.
- Cons: May lack a comprehensive view of the entire system's progress.
By Area or Room
- Divides assets based on building areas and specific rooms.
- Enables a focus on critical areas and integrates well with project timelines.
- Pros: Direct insight into critical areas and integration with project schedules.
- Cons: Harder to track readiness of distribution systems, requires special focus on test types.
By System, Asset, or Equipment
- Divides assets by specific systems, such as ventilation, with detailed checks for each.
- Offers a clear view of progress for each individual asset.
- Pros: Efficient management of prerequisites, easy division into different disciplines.
- Cons: May lack a clear overview of mechanical completion across the entire project.
The structure of the overview (and video)
You can structure your Test overview in many different ways. The most common ways are described in the video below which also includes pros and cons.
How you can plan and schedule tests in the overview
The Test overview can also serve as an overall test schedule. Next to each item, dates are given in their corresponding fields (for example for FPT), which together with the outstanding fields gives a picture of when a test can be performed.
When using CxPlanner to manage your Test overview a Gantt chart is automatically generated, which gives a clear overview of the time schedule and project progress.